THIS DOCUMENT ISN'T FINISHED. —L. (HAA)
I had the idea in my head for a while that you could probably build an electric guitar for a few bucks with some commonplace items from your local hardware store. And I do mean the whole guitar – body/neck, tuners, pickup, bridge, &c. – everything with the exception of strings1. In particular, I was interested in trying-out a direct-pull tuning system (à la Steinberger) using small turnbuckles.
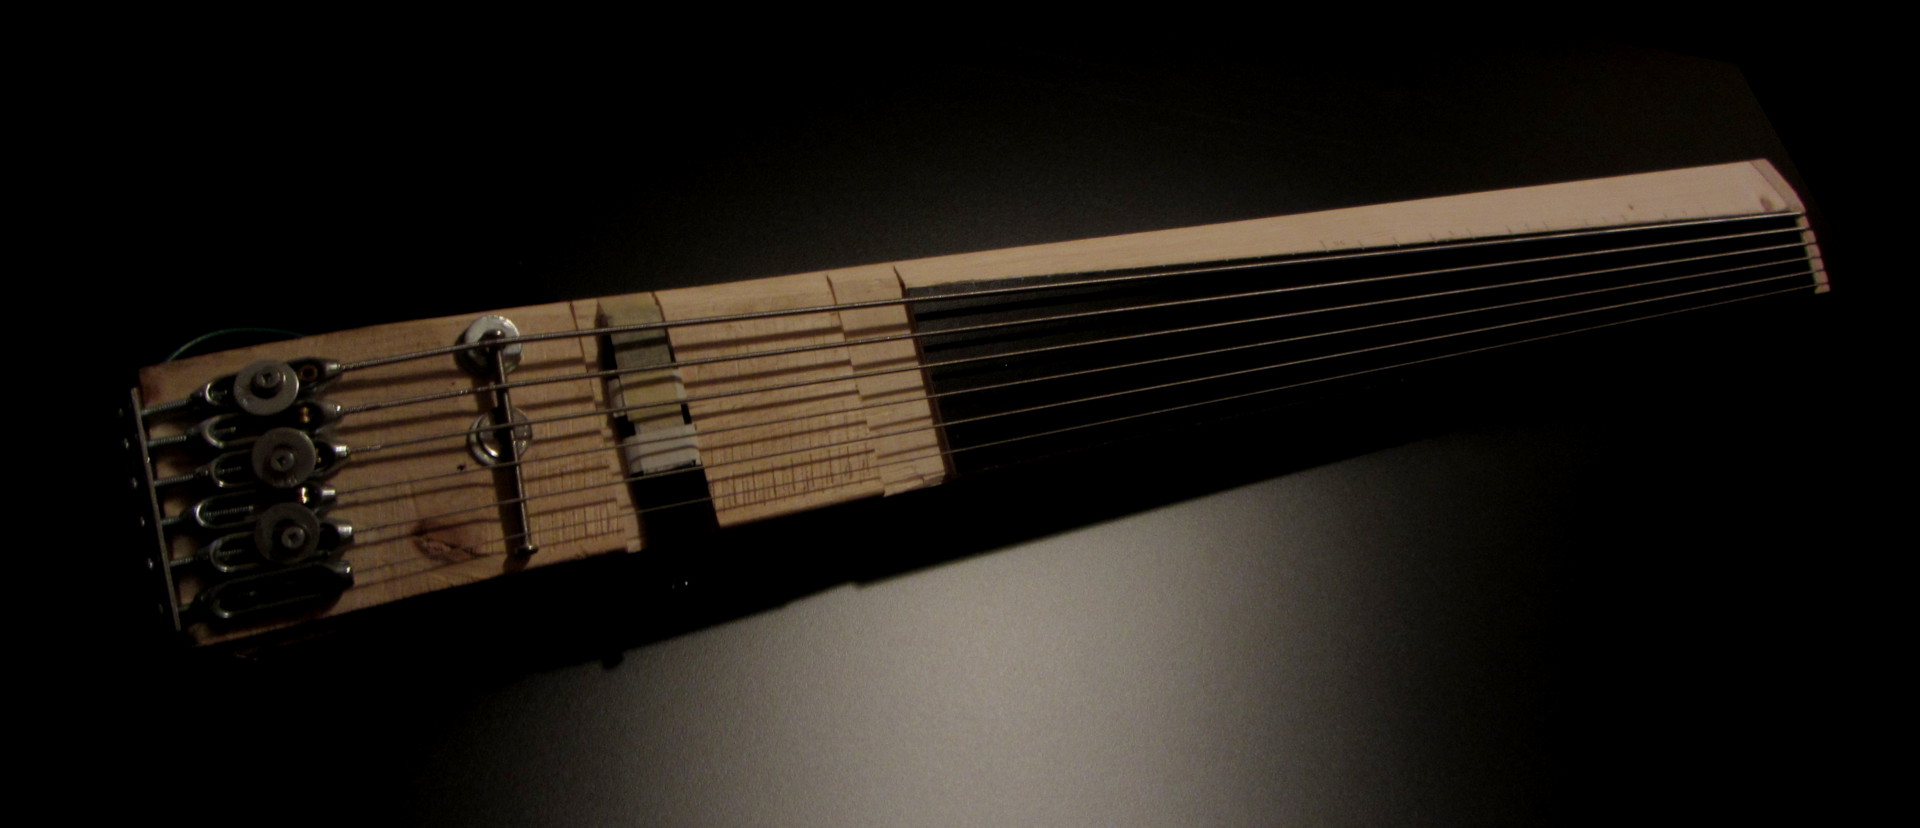
I did it. It works. I'd like to do it again, because this first attempt is very sloppy, but here's what I came up with for a prototype.
I know; you want to see if the darned thing is playable or what. Here:
First, you should figure out what the hell you're building. I figured I'd do a short-scale bass – with six strings. Why not?
Next, you need a board. I grabbed a 2×4 out of the free lumber pile at my neighbourhood hardware store. It was discarded from some kind of shipping container or palette, so it had an inch-wide channel, about 1/4" deep, straight down the middle of its rough side; that detail isn't important, but I thought I'd mention it because you can see it in the photos and I don't want it to raise any questions. It's not functional; it's not aesthetic – that's just the shape the board was in when I salvaged it.
Finally, you'll need some parts. I won't give a fully itemized list, because your own project will of course vary, but the ingredients for mine more-or-less boiled down to:
Then, for the pickup:
And, or course, some tools. I used a hand saw, electric drill, pocket knife, soldering iron, and a screwdriver. That's it!

The diagram is fairly self-explanatory. The following photos should help illustrate the details.
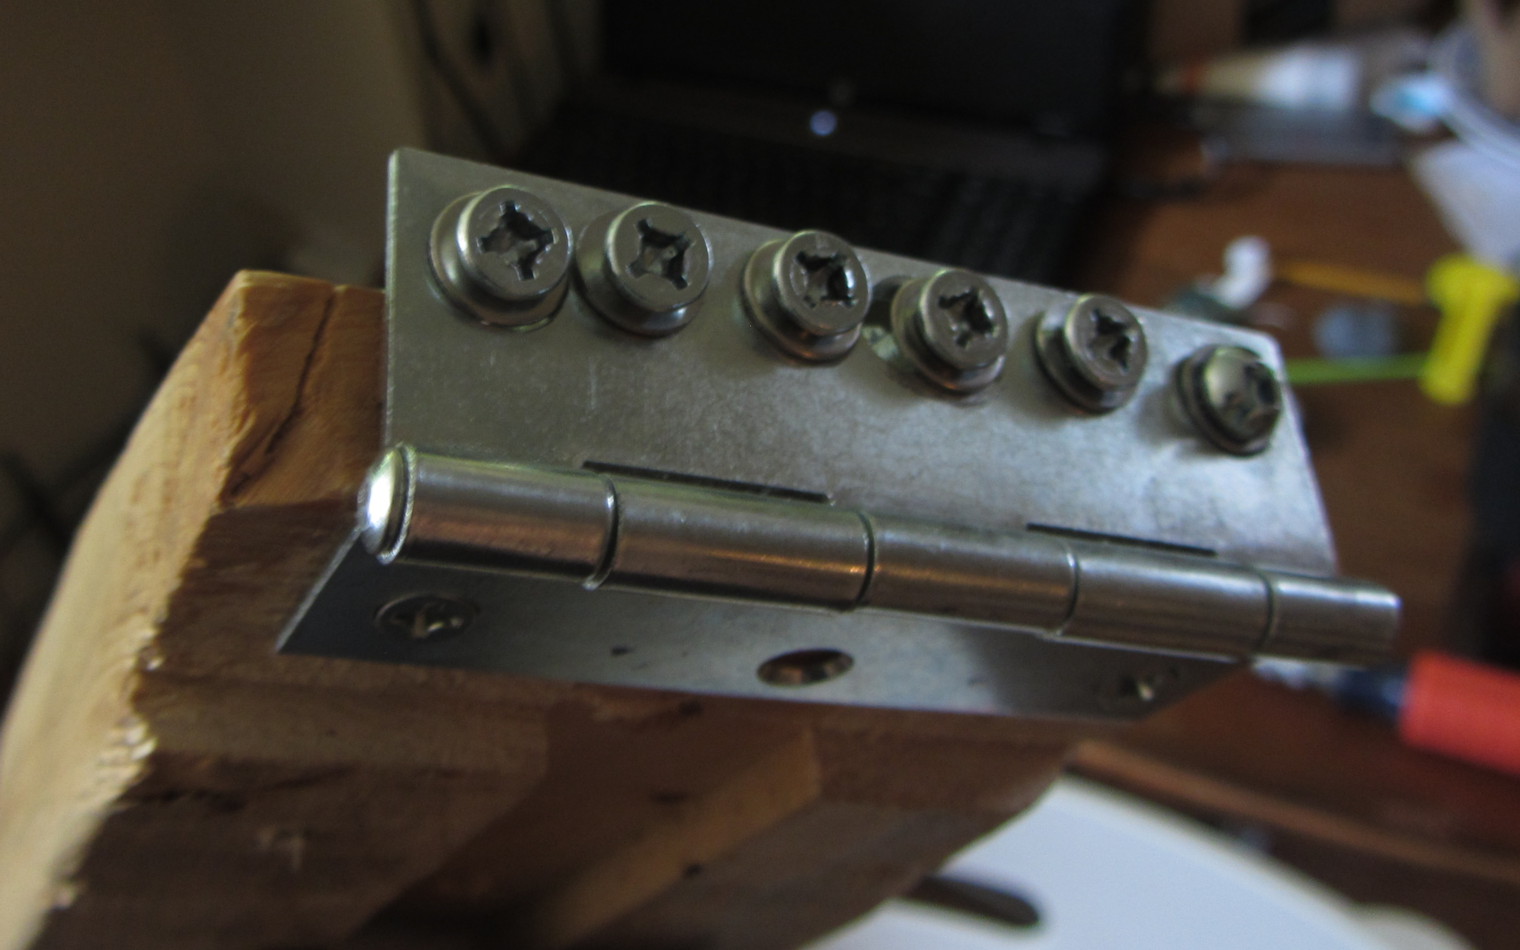
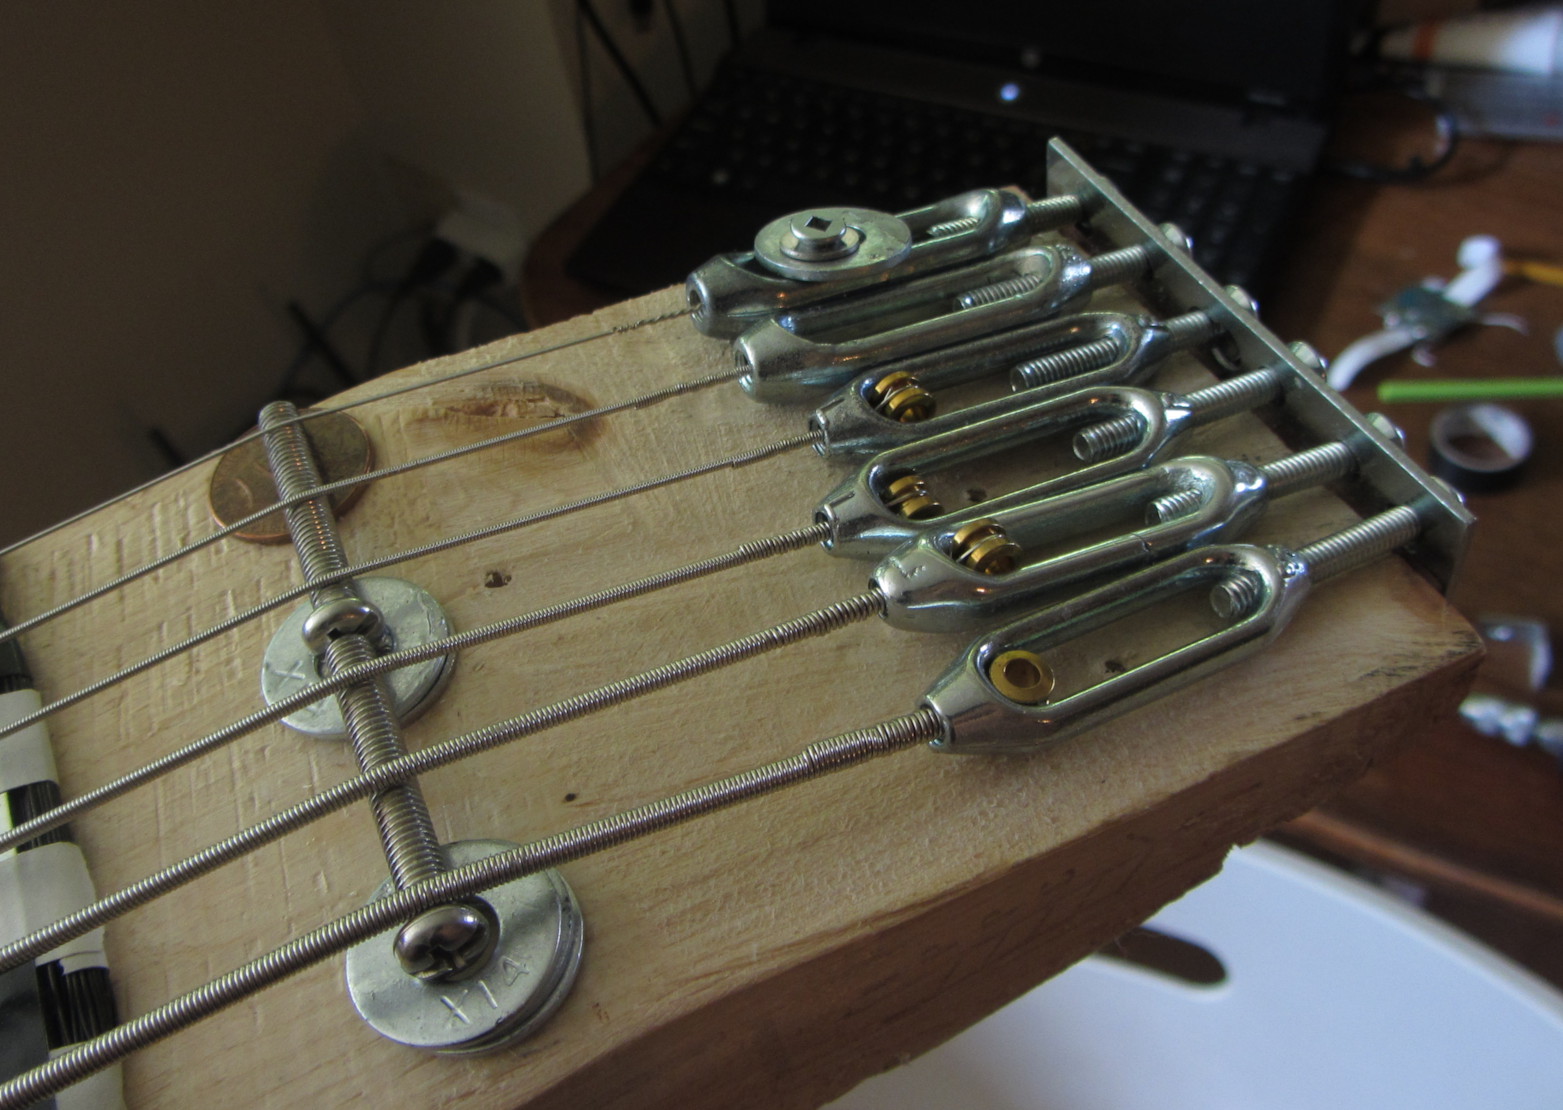
The guitar string goes through one end of the turnbuckle so that the ball-end is trapped inside, and the screw coming from the hinge goes through the other end. You turn the screws to increase/decrease string tension. Notice the screw/washer in the turnbuckle: when you turn the screw, the turnbuckle will want to turn as well, so the screw in the middle of the turnbuckle keeps it from turning 'round.
The bridge, as you can see, is simply a couple of screws propped-up on some washers and coins. Very fancy.
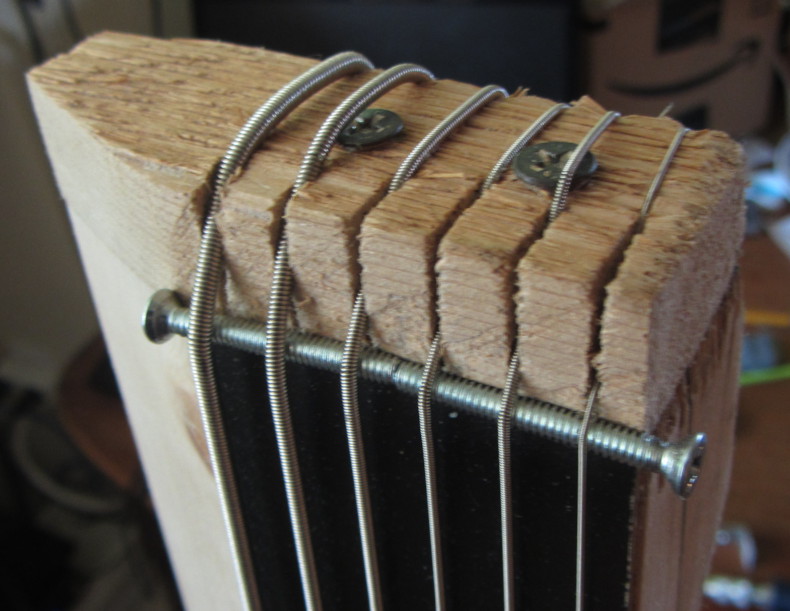
The strings then run over the zero-fret (two screws here, 'though these have been replaced with a small length of hard steel wire) through the string guides sawn in the end of the board. As you can see, my board was a bit short for my desired scale length (32 in.), so I just screwed on a little hunk of cedar at the end of the 2x4.

Finally, the strings tie-off around the backside of the neck. Next time I make one of these, I'll have a few extra inches past the zero-fret so that I can put these tie-offs further up the neck. These get in my thumb-space when playing at the first position.
...
For a smooth/hard fingerboard, I glued down a strip of melamine laminate. Y'know, kitchen counter-top stuff. You can get a big sheet of it for a few bucks.
It's very important that before gluing, you've got a dead-flat board surface to glue onto. Actually, having a few small dips in the board isn't as big a deal as having bumps in the board. Watch out for knots! I didn't quite flatten out a tiny knot between the fourth and fifth positions under the third string, and now that F# is buzzy. It's the only buzzy spot on the fingerboard, but that just makes it even more irritating.

If you read anything about guitar pickups, you'll see a lot of information about the tone and output of different magnet materials, coil-wrapping techniques, wire gauge and material, insulation, bobbin material, alignment of the planets, and so-on. The world of guitars – of musical instruments in general – is largely subjective, often pseudoscientific, and frequently downright metaphysical.
The facts are these: if you wrap a coil of wire around a magnet and then perturb the magnet's field (say, by moving a steel guitar string through it), the change in magnetic flux in the coil creates electromotive force. That's the essential idea. The materials and composition do matter; magnet strength, wire material, wire gauge, and the number of turns of wire are all important considerations, and they have a well-understood system of relationships.
On and on it goes. It's a balancing act.
Most commercial guitar pickups have thousands of feet of 41-to-46-gauge copper wire in their coil. I bought 100 feet of 28AWG annealed steel wire from the hardware store. I made a working pickup with about fifty feet of it. I tried to use all 100 feet, but the coating was lousy and I was getting shorts in my coil, so I had to cut the wire back to about 50 feet. Or was it 25? In either case, not very damned much.

For magnets, I grabbed a pack of four 0.5" neodymium disk magnets from a craft store. I bought a 3" steel/zinc mending plateI as well. The plate was for holding all of the magnets and for acting as a sort-of half-bobbin to keep the wire wraps somewhat stable, but, more than that, because as it conducts magnetic flux it acts as a "rail" to distribute the magnetic field from the four magnets evenly beneath the six strings. If I use the pickup magnet-side-up, I get a somewhat hotter four-pole pickup; magnet-side down, I get a quieter rail-style pickup.
I DIDN'T WRITE THIS PART YET.
I never do anything for one reason; there has to be some kind of critical mass of reasons to bother doing something at all.
In large part, this happened because I am an absolute cheapskate. My other bass is in storage about 400 miles away, and it'd cost something in the neighbourhood of $120 to ship it here. I figured I could build one for less.
Moreover, I'd wanted to build an ultra-minimalist electric guitar for years, and I thought this would be a good opportunity to experiment. It would be a fun project. I like making things. I particularly like making things with severe resource constraints.
Finally, I have hung-out with bands, jammed, talked shop – half of my friends are musicians – I even worked in a guitar store for a while, so I know first-hand that there exists amongst guitarists a Cult of The Axe. And it is an idiot cult. You may believe that old-growth tonewood, Alnico II magnets, enameled wire, and nitrocellulose lacquer are the requisite charms to summon the almighty god, Tone, but here's what I believe: tone is something that musicians summon from whatever they're playing. A great drummer will move your ass with a cardboard box and it will sound like holy thunder. A hack with a $10,000 drum kit will sound like a troupe of raccoons knocking-over garbage cans. Fetishization of musical instruments only serves the people who want to produce expensive instruments and the saps who want to buy/hoard/collect them. It does nothing to produce good music.
I love gear, too. I love craftsmanship, and who doesn't love a beautiful piece of hardwood? But I hate the hokum and fetishism around tone, and I hate boutique culture and the bourgeois snobbery that accompanies it.
So, when the opportunity arises, make art from junk.
1. Actually, strings are probably doable, too. The Malagasy build valiha using strings made from bicycle brake cable. I'm sure there's some cabling at the hardware store that would work, but I didn't want to have to experiment with string tension and tuning (in)stability. So I just bought some cheap strings.